Owncloud

About

ownCloud is a personal productivity powerhouse. It gives you universal access to all your files, contacts, calendars and bookmarks across all of your devices. Unlike many of the shared repository services out there, with ownCloud, you have your own, private repo. However, just like the public repo companies, with ownCloud you can share your files with friends and co-workers. If you need it, ownCloud even integrates with other storage providers. Best of all, ownCloud is open source and free! Key Features of ownCloud: ownCloud Community Edition: Installed from Debian repository (auto security updates) SSL support out of the box. Adminer administration frontend for MySQL (listening on port 12322 – uses SSL). Postfix MTA (bound to localhost) to allow sending of email (e.g., password recovery). Webmin modules for configuring Apache2, PHP, MySQL and Postfix. Why use the ownCloud? Niles Partners makes it easy to run ownCloud in the cloud, locally or virtually. The Niles Partners ownCloud Stack is: Up-to-date We track every release of ownCloud and update our stack shortly after it’s released. Secure If serious security issues are discovered, we provide new versions of ownCloud as soon as possible, often within hours of the availability of a fix. Consistent With Niles partners you get the same software stack and configuration regardless of where you are deploying ownCloud or other Applications. This makes it easy to migrate between different platforms. With the Niles Partners ownCloud Stack, stack compiling, configuring and all of its dependencies are taken care of, so it works out-of-the-box.
- Type virtual machines in the search.
- Under Services, select Virtual machines.
- In the Virtual machines page, select Add. The Create a virtual machine page opens.
- In the Basics tab, under Project details, make sure the correct subscription is selected and then choose to Create new resource group. Type myResourceGroup for the name.*.
- Under Instance details, type myVM for the Virtual machine name, choose East US for your Region, and choose Ubuntu 18.04 LTS for your Image. Leave the other defaults.
- Under Administrator account, select SSH public key, type your user name, then paste in your public key. Remove any leading or trailing white space in your public key.
- Under Inbound port rules > Public inbound ports, choose Allow selected ports and then select SSH (22) and HTTP (80) from the drop-down.
- Leave the remaining defaults and then select the Review + create button at the bottom of the page.
- On the Create a virtual machine page, you can see the details about the VM you are about to create. When you are ready, select Create.
It will take a few minutes for your VM to be deployed. When the deployment is finished, move on to the next section.
Connect to virtual machine
Create an SSH connection with the VM.
- Select the Connect button on the overview page for your VM.
- In the Connect to virtual machine page, keep the default options to connect by IP address over port 22. In Login using VM local account a connection command is shown. Select the button to copy the command. The following example shows what the SSH connection command looks like:
ssh azureuser@<ip>
- Using the same bash shell you used to create your SSH key pair (you can reopen the Cloud Shell by selecting >_ again or going to https://shell.azure.com/bash), paste the SSH connection command into the shell to create an SSH session.
Usage/ Deployment Instructions
Getting Started with Owncloud.
-
Visit
http://your-server-ip/ 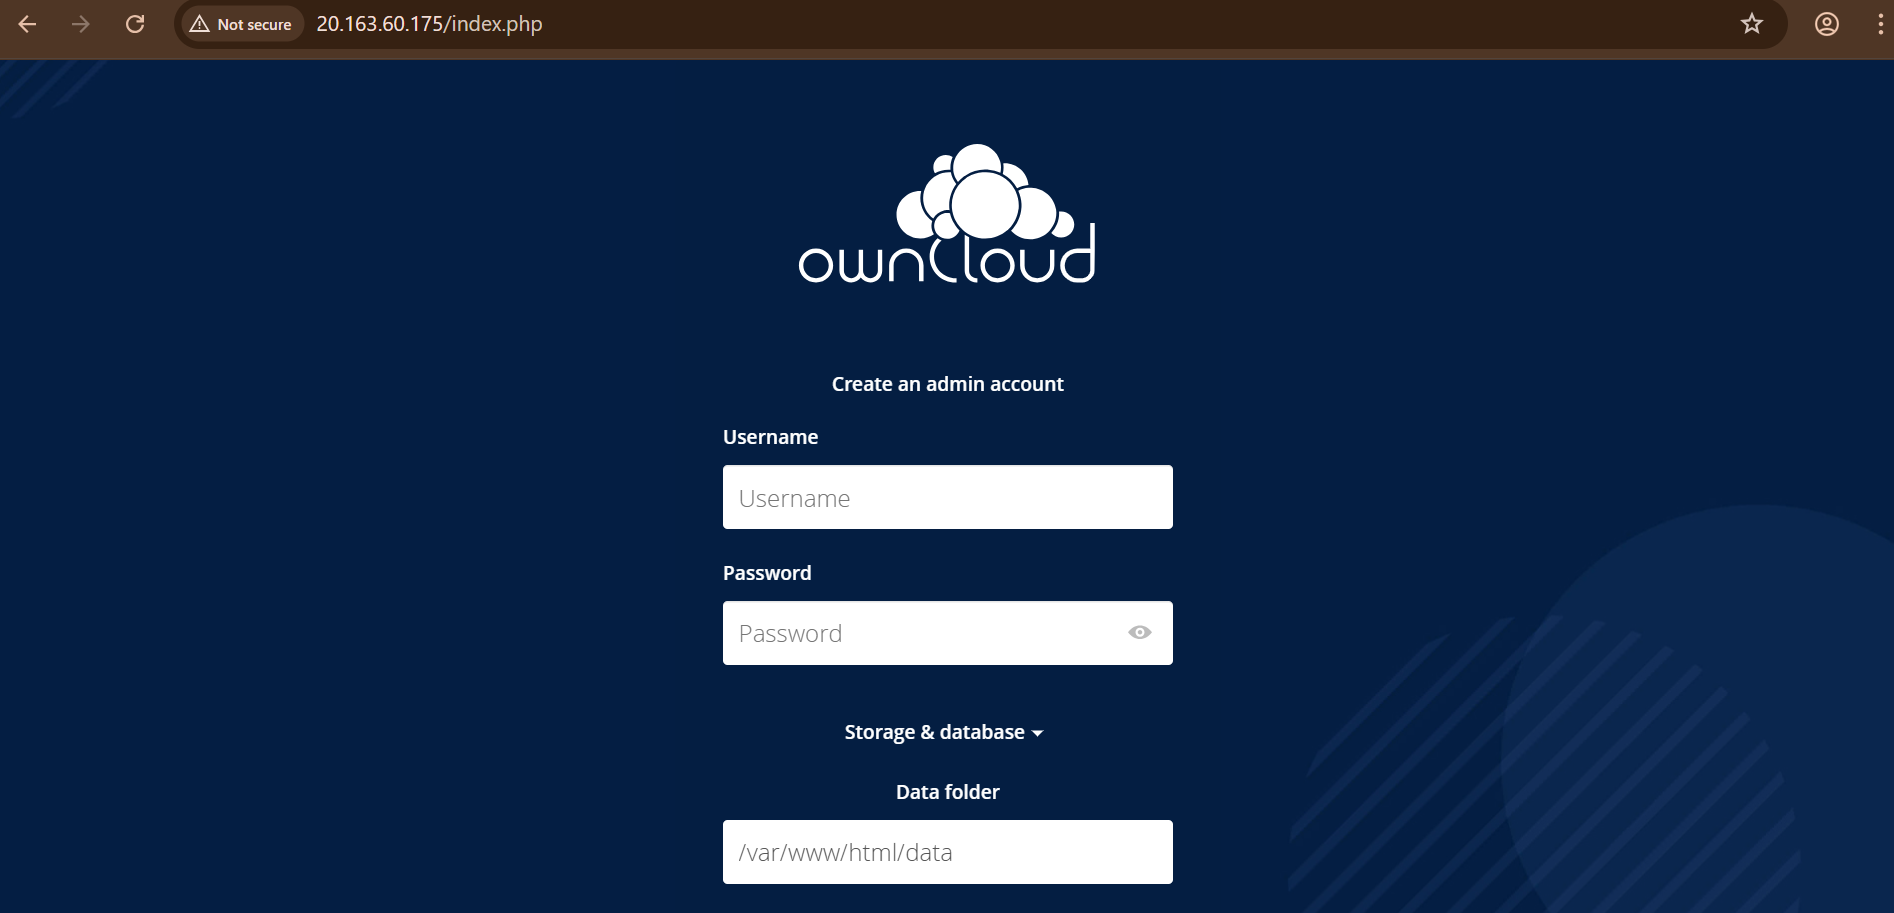
-
Create an admin account
-
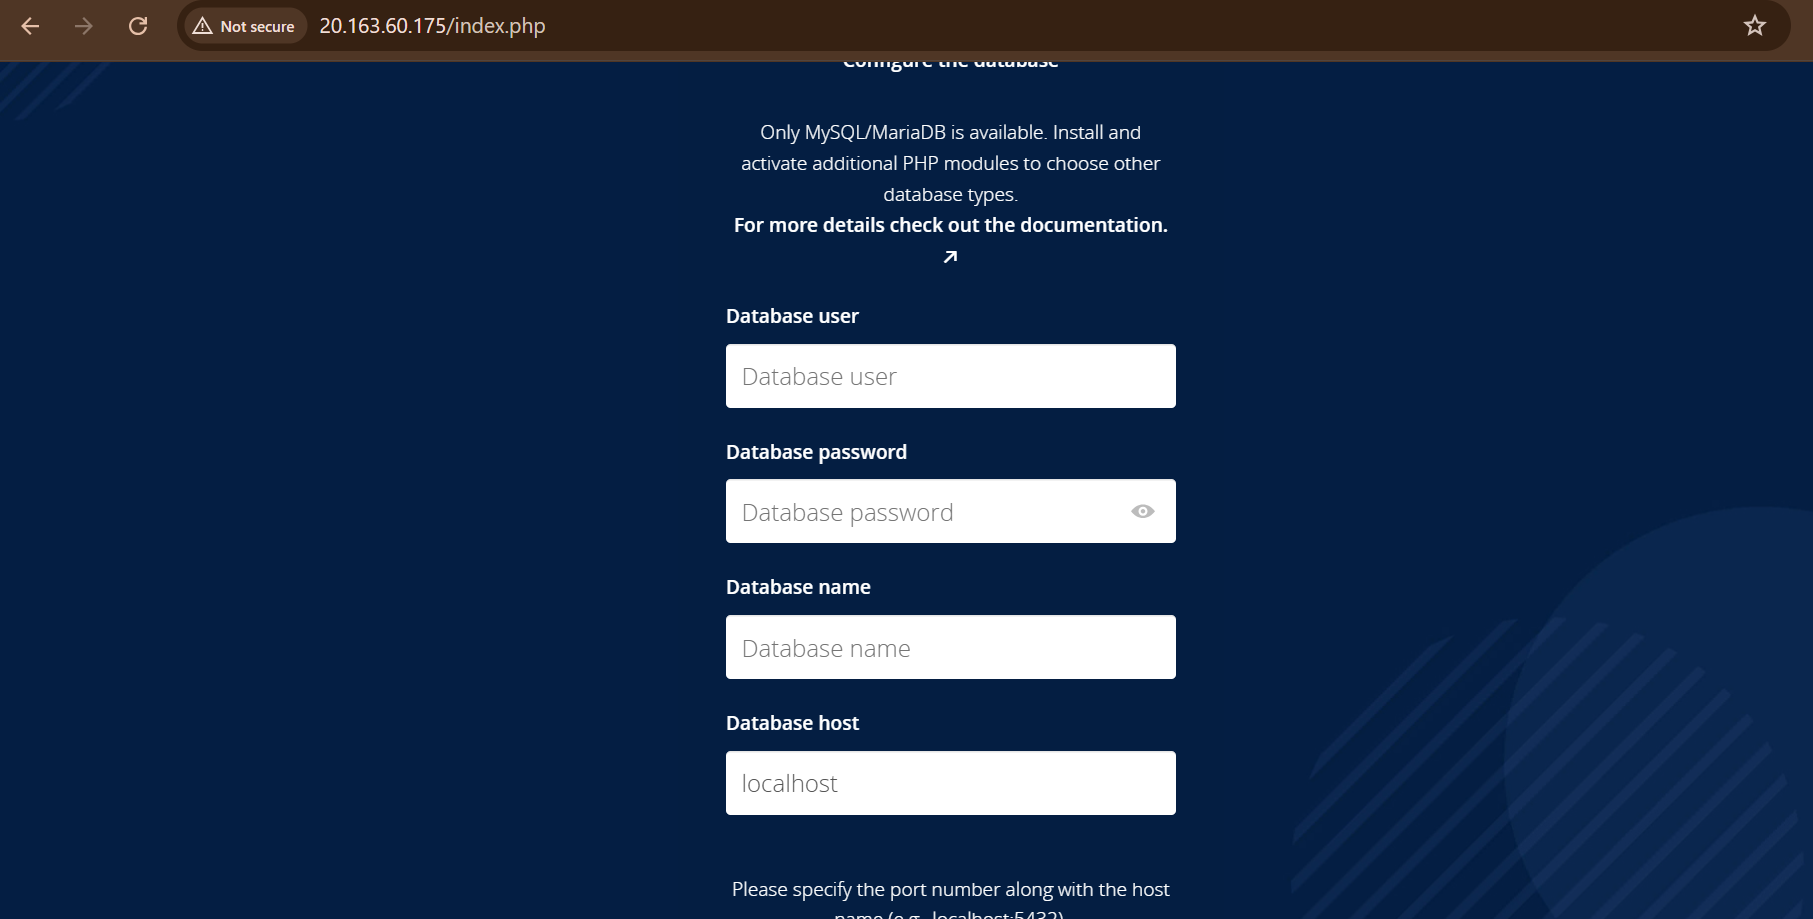
Enter MySQL database detailsLogin to machine and go to below path
- sudo su
- cd /home/niles
- and open password.txt for database details.

- (510) 298-5936
Submit Your Request
Highlights
- Faster performance with improved caching
- Enhanced security (bug fixes, hardening)
- Improved UI/UX for easier navigation
Application Installed
